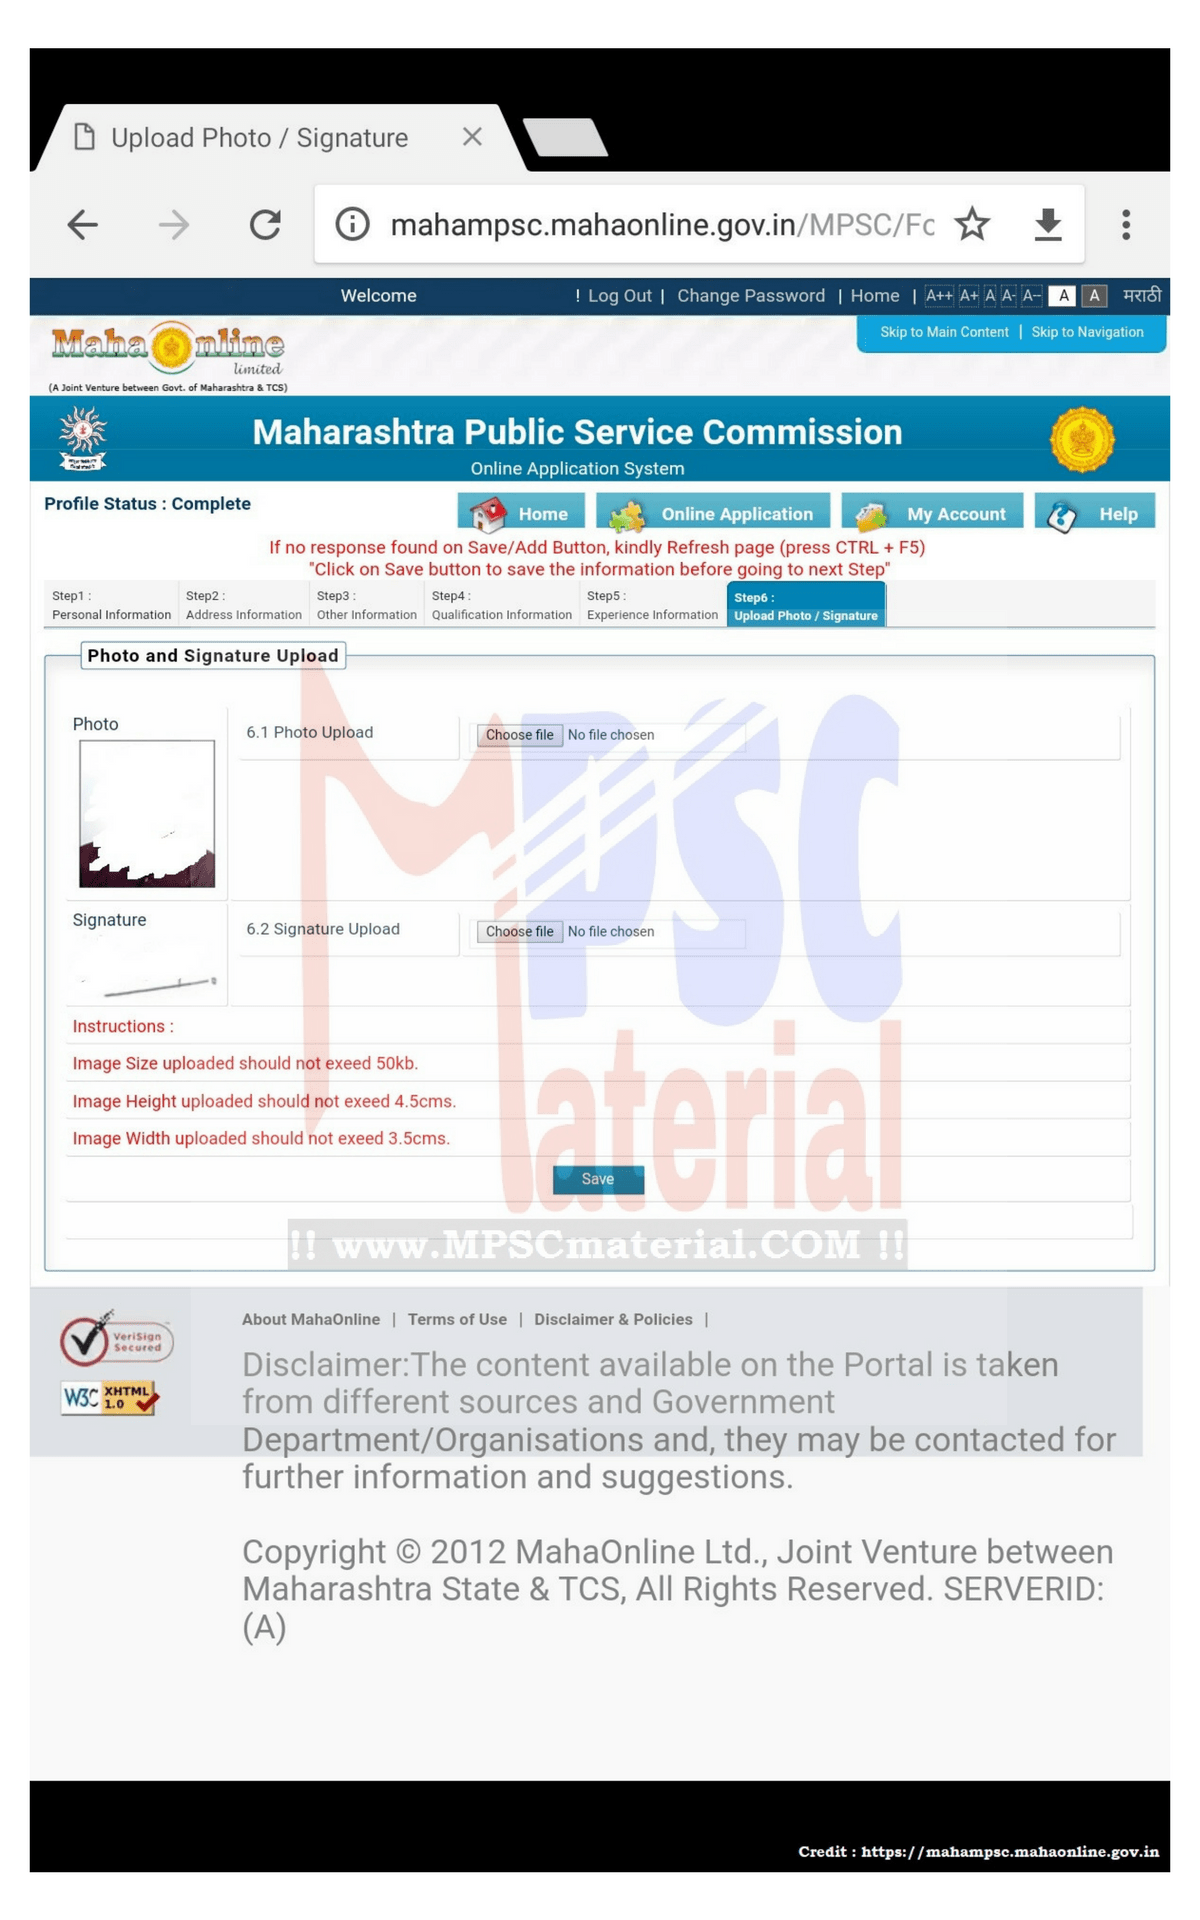
Step 7: Uploading Photo and signature
This is last step of creating new account in MPSC Online Application System. after completing this step your profile status will be complete.
so, how to upload photo and signature in mpsc profile ?

Note : See the instructions given in the website itself.
Welcome to MPSC Material and series of Creating new Account in The MPSC Online Application System.
We are now at the Final Step of creating account in MPSC Online.
In This step we will upload our recent Photo and the Signature. So, let’s get started
Note:
- Before editing photo or signature keep the one copy at the secure place.
- Before editing your photo or signature image must be clear to see.
- Your Photo must be one of the extensions that Paint app can open.
Now you are ready to edit the photo and signature.
Use “Paint” App or “Microsoft Office Picture Manager”
lets get started “how to upload photo and signature in mpsc profile ?”
First try to edit the photo and signature in their method which is given on mahampsc website itself or i will paste link here.
Default App : https://icrop.mahaonline.gov.in/home/mpsc
Here we will edit our photo in the paint app itself. Step by step:
Step 1: Open the photo using paint.
To open the photo with paint right click on that photo and then select the menu open with… and in the menu you will see Paint. So, open it with paint.
Step 2: Cropping the photo if needed.
If your photo is good or rectangle before the editing then without cropping you can edit it
If your photo is not rectangle or anything else. But it’s not suitable to edit.
So, to crop the image first select the image: to select the image click on the select menu in the home tab of the pain and then select your photo what you want.
Step 3: Editing the photo.
If your cropping id done then you can select all photo by pressing Ctr+A keys on the keyboard and then in the Home tab of the paint click on the resize menu. Now resize menu will open. In the resize and skew window first select the pixel radio button and uncheck the Maintain aspect Ratio Checkbox then..
To edit your Photo: in the horizontal filled type 130 and in the vertical filed type 170 and then click on the ok button. You are done with editing your photo. Now to save it click on file then save as and then select jpeg picture and then if you want then change the name and then click on the save button. Now check location of your file and see the file size if it is less than the 50kb then its good and you can view the size of image by moving mouse on that image or by right clicking on that button and then choosing properties the last menu.
To edit your Signature: in the horizontal filled type 100 and in the vertical filed type 90 and then click on the ok button. You are done with editing your signature. Now to save it click on file then save as and then select jpeg picture and then if you want then change the name and then click on the save button. Now check location of your file and see the file size if it is less than the 50kb then its good and you can view the size of image by moving mouse on that image or by right clicking on that button and then choosing properties the last menu.
Error : mpsc photo upload problem invalid file
So, if you get this year then you can use there image cropping tool.. that will solve your problem.. Otherwise delete files under %temp% folder in personal computer.
This is how you can edit your photo and signature with paint to upload on MPSC Online Application System.
If you are facing the problem by doing this all and the size of your photo is still large than we want then you crop the photo and if you are facing problem with length then also you can select more area to crop the photo.
If you are still facing problem then you can use picture manger in windows operating system itself.
So, this is how you can edit your photo and signature to upload in MPSC Online Application System.
So this is end of series of creating the new account in the MPSC Online Application System. You can read it again from starting.
now you know that how to upload photo and signature in mpsc profile.
Thanks,
So by clicking on the any step you can read that step:
Step 2: Adding Personal Information
Step 3: Adding Address Information
Step 4: Adding Other Information
Step 5: Adding Qualification Information
Step 6: Adding Experience Information
Step 7: Uploading Photo and Signature
So, this was complete tutorial of How to Create New Account in MPSC Online Application System.
This is the end of the series of how to create new account in the MPSC Online Application System.
If you like this series then don’t forget to share this post with your friends and in the social media groups like Facebook, WhatsApp etc. and don’t forget to follow us on carious social media account all the links are there in the sidebar of this website.